VI. DOMAIN
CÁC BƯỚC TRIỂN KHAI
1. Nâng cấp Domain Controller
2. Join máy Workstation vào Domain
3. Cấu hình Policy trên máy Domain Controller
a. Cấu hình cho phép đặt password đơn giản
b. Cấu hình cho phép Group Users được log on trên DC
4. Tạo Domain Group và Domain User
5. Cài Remote Server Administrator Tools cho máy Client
A- CHUẨN BỊ
– Mô hình bài lab bao gồm 2 máy:
+ PC01: Windows Server 2016
+ PC02: Windows 8.1 Enterprise
– Chỉnh password account Administrator cho cả 2 máy là 123
– Disable card CROSS. Gỡ bỏ Protocol TCP/IP IPv6 trên card LAN
– Kiểm tra 2 máy liên lạc với nhau bằng lệnh PING
B- THỰC HIỆN
1. Nâng cấp Domain Controller (Thực hiện tại PC01)
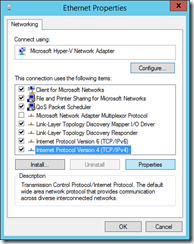
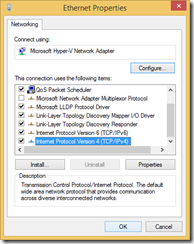
– Mở Control Panel -> Network and Sharing Center, chọn Change Adapter Settings. Chuột phải lên card LAN, chọn Properties -> Chọn Internet Protocol Version 4 (TCP/IPv4) -> Nhấn Properties.
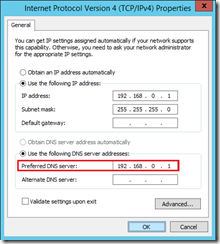
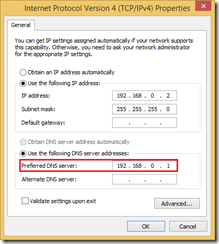
– Ở mục Preferred DNS server, trỏ về IP của chính mình -> OK.
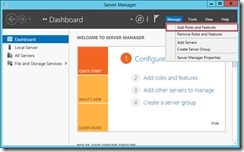
– Mở Server Manager, vào menu Manage, chọn Add Roles and Features
– Màn hình Welcome -> Next
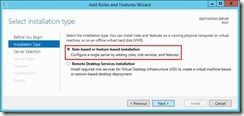
– Màn hình Select installation type -> chọn Role-based or feature-based installation -> Next
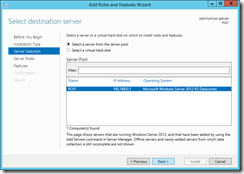
– Màn hình Select destination server, giữ nguyên như mặc định -> Next
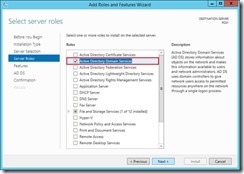
– Màn hình Select server roles, đánh dấu chọn vào ô Active Directory Domain Services
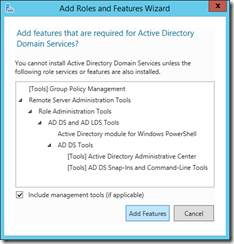
– Cửa sổ Add Roles and Features Wizard -> nhấn vào nút Add Features -> Next
– Màn hình Select features, giữ nguyên như mặc định -> Next
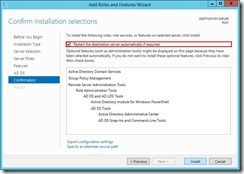
– Màn hình Confirm installation selections, đánh dấu chọn vào ô Restart the destination server automatically if required -> Nhấn nút Install
– Quá trình cài đặt diễn ra. Sau khi cài đặt xong, nhấn vào mục Promote this server to a domain controller
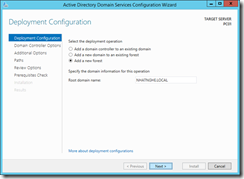
– Màn hình Deployment Configuration, chọn Add a new forest. Ở mục Root domain name, đặt tên: NHATNGHE.LOCAL
– Màn hình Domain Controller Options, ở mục Specify domain controller capabilities, đánh dấu chọn vào ô Domain Name System (DNS) server. Ở mục Type the Directory Services Restore Mode (DSRM) password, nhập vào mật khẩu P@ssword -> Next 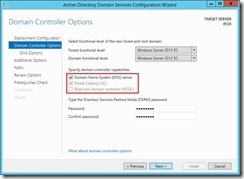
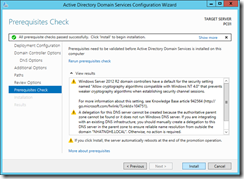
– Các bước còn lại, nhấn Next theo mặc định. Màn hình Prerequisites Check, khi nhận được thông báo All prerequisites check passed successfully nghĩa là quá trình kiểm tra điều kiện để lên DC đã thành công -> nhấn nút Install để bắt đầu cài đặt
2. Join máy Workstation vào Domain (Thực hiện trên PC02)
– Mở Control Panel -> Network and Internet -> Network And Sharing Center -> Change adapter settings -> Disable card Cross
– Chuột phải card Lan -> Properties. Bỏ dấu chọn ở ô Internet Protocol Version 6 (TCP/IPv6). Sau đó chọn Internet Protocol Version 4 (TCP/IPv4) -> chọn Properties
– Chỉnh Preferred DNS server về IP Máy PC01-> OK -> Close
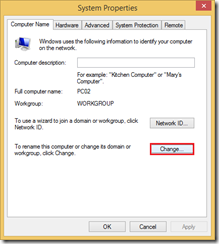
– Nhấn tổ hợp phím ÿ + R, gõ lệnh Sysdm.cpl
– Trong tab Computer Name, nhấn Change
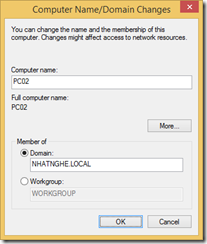
– Ở mục Member of -> chọn Domain, sau đó gõ tên domain NHATNGHE.LOCAL -> OK
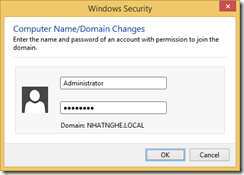
– Cửa sổ Windows Security, nhập vào Username và password: Administrator/P@ssword
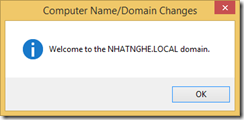
– Quá trình join domain thành công, khởi động lại máy tính
3. Cấu hình Policy trên máy Domain Controller
a. Cấu hình cho phép đặt password đơn giản
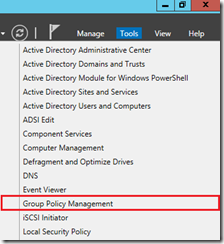
– Quay lại máy PC01, mở Server Manager. Vào menu Tools, chọn Group Policy Management.
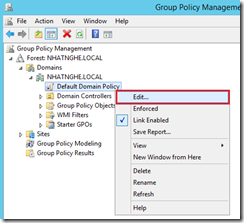
– Lần lượt bung các mục Forest: NHATNGHE.LOCAL -> Domains -> NHATNGHE.LOCAL -> Chuột phải Default Domain Policy, chọn Edit
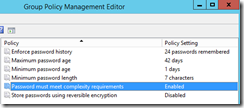
– Lần lượt mở theo đường dẫn Computer Configuration -> Windows Settings -> Security Settings -> Account Policy -> Password Policy -> double click vào Password must meet complexity requirements
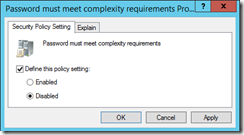
– Chọn Disabled -> OK
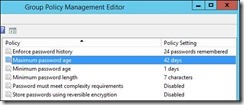
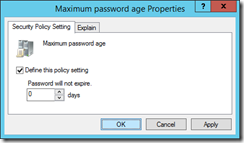
– Quay lại cửa sổ Group Policy Management Editor, nhấn double click vào Maximum password age
– Ở mục Password will not expire, sửa giá trị thành “0” -> OK
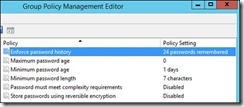
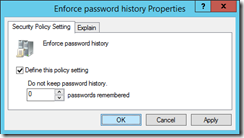
– Quay lại cửa sổ Group Policy Management Editor, nhấn double click vào Enforce password history
– Ở mục Do not keep passwords remember, sửa giá trị thành “0” -> OK
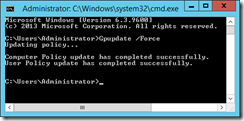
– Sau khi chỉnh policy xong, mở CMD, gõ lệnh: Gpupdate /Force
b. Cấu hình cho phép Group Users được log on trên DC
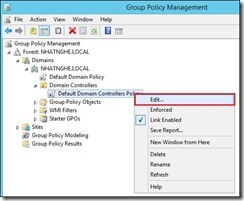
– Lần lượt bung các mục Forest: NHATNGHE.LOCAL -> Domains -> NHATNGHE.LOCAL -> Domain Controllers -> Chuột phải Default Domain Controller Policy, chọn Edit
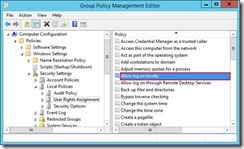
– Mở theo đường dẫn sau Computer Configuration -> Policies -> Windows Settings -> Security Settings -> Local Policies -> User Rights Assignment -> double click vào mục Allow log on locally
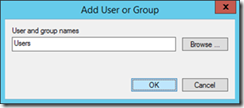
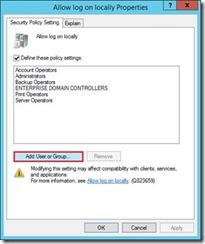
– Nhấn vào nút Add User or Group -> nhập vào Users -> OK -> OK
– Sau khi chỉnh policy xong, mở CMD, gõ lệnh: Gpupdate /Force
4. Tạo Domain Group và Domain User
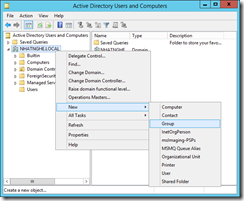
– Mở Active Directory Users and Computers. Chuột phải NHATNGHE.LOCAL -> New -> Group
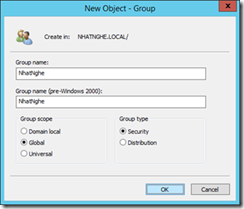
– Group name : Nhat Nghe -> OK
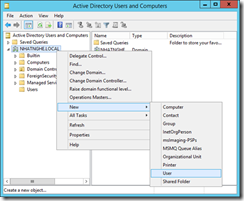
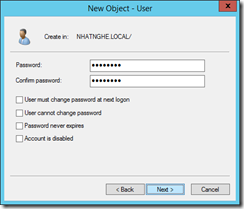
– Chuột phải NHATNGHE.LOCAL -> New -> User
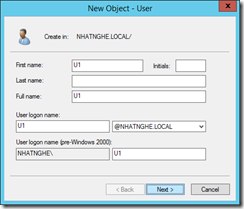
– Full name : U1
User logon name : U1 -> Next
– Password/Confirm password: P@ssword
Bỏ dấu chọn ở ô User must Change password at Next logon -> Next
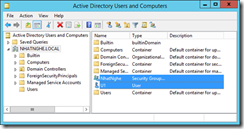
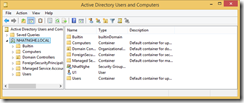
– Quan sát thấy Domain Group và Domain User vừa tạo
5. Cài Remote Server Administrator Tools cho máy Client (Thực hiện trên PC02)
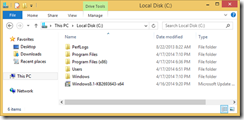
– Log on NHATNGHE\Administrator. Truy cập Server, chép source Windows8.1-KB2693643-x64 vào ổ C: và chạy file này.
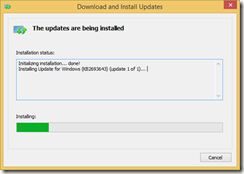 – Quá trình cài đặt được thực hiện. Sau khi cài xong nhấn Close
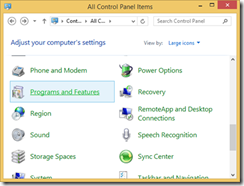
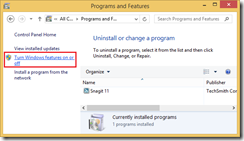
– Mở Control Panel -> chọn Program and Features
– Ở góc bên trái -> chọn Turn Windows features on or off
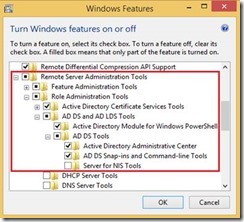
– Đánh dấu chọn vào các mục như trong hình.
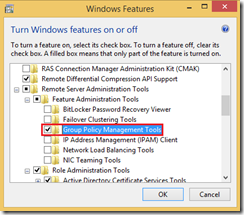
– Chọn Group Policy Management Tools -> OK -> Close
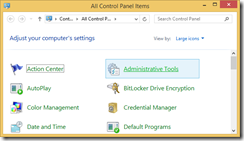
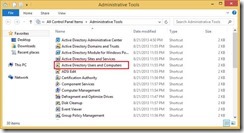
– Mở Control Panel, chọn Administrative Tools
– Mở Active Directory Users and Computers
– Truy cập vào Active Directory Users and Computers thành công
– Kiểm tra:
+ Trên PC02 tạo user U2, password 123 -> tạo thành công
+ Trên PC01, mở AD kiểm tra thấy có user U2

![clip_image038[1] clip_image038[1]](/wp-content/uploads/2020/02/clip_image0381_thumb.png)
